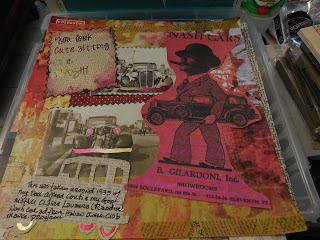
My Aunt and Dad on a Nash?
STEP 1. Hi everyone, I thought I would try and detail how I do a scrap-booking page here. Something that I've never really quite done before and I hope u enjoy the process.
What got me thinking about this was, I am doing an on-line art class from Big Picture classes and am learning how to incorporate foiling techniques into my scrap-booking and not just little embellishments, which is why I bought the MINCs in the first place. I really love the metallic and shine that it adds to a project.
 I bought both the small one and the large MINC machines. LOL! The small one to do small embellishments and carry to crops and the large one to do 12 x 12 format pages. I got them both on sale, the small one at Jo-Ann's and the large one at Michael's.
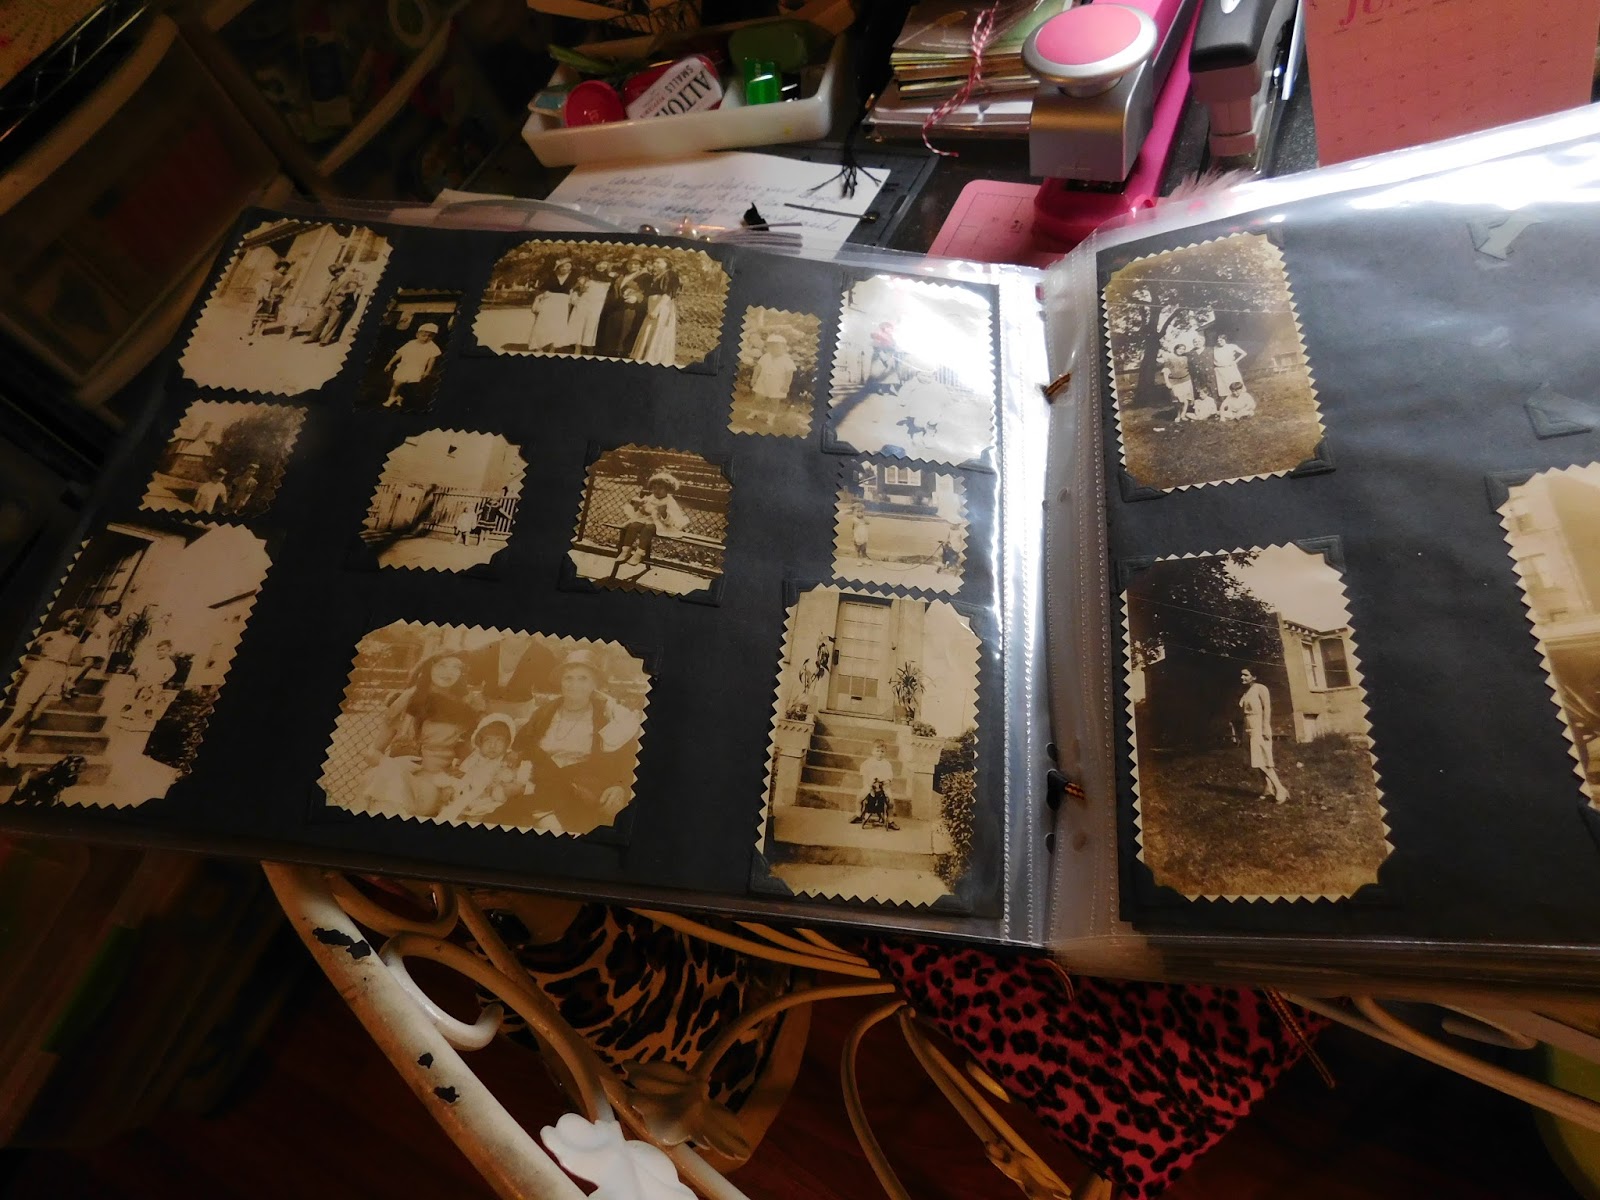
So as I mention previously I've spent the better part of a year scanning, cropping, and putting pages into archival sleeves of my Great Aunt Mirta's photo albums.

I recognize about half of my relatives in the photos.
 One of these pages is of my Dad Alfred Conti and my God mother Claire Lavarra Randise sitting on a very cool car. My Dad was about 4 and my Aunt was about 6. This photo was taken around 1935 in Union City New Jersey probably, (according to my Dad).
 I really wanted to incorporate 3 of the photos but it turned out that only two photos at a time with other embellishments would fit practically on a 12 x 12 page. So here are the two photos that I am gonna use to create the page. I used Adobe Photoshop to crop several of the photos separately.
So one of the lessons in the Heidi Swapp Big Picture MINC classes was foiling on photos! So I'm gonna put foil on the bumper and headlamps..Why are they standing behind the bumper u ask? Cause they could...? OK, more to that to come... This is part one.

 STEP 2. Alright this is gonna be a 12 x12 scrapbook page. (That is the format that I chose for all my scrapbook pages) and it is gonna also incorporate an ad from an Italian Dance Program that my Grand father Sam Cudia published, and why do you ask? well hold on.. Here is the front of the dance program.
 Inside the dance program, is a list of patrons and of course half of them are related to me!
 So here is the back of the dance program and you will understand the relationship I am going for here.
 Is this cool or what!!! So now u see the similarity in the cars...
STEP 3. Now to incorporate some saying on the page and foil it. So I went on-line to Pinterest.com and searched on handwriting fonts that look sort of similar to Heidi Swapp's.
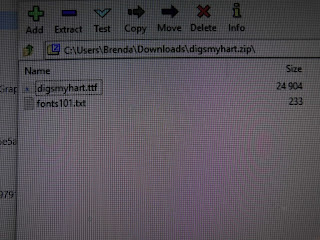
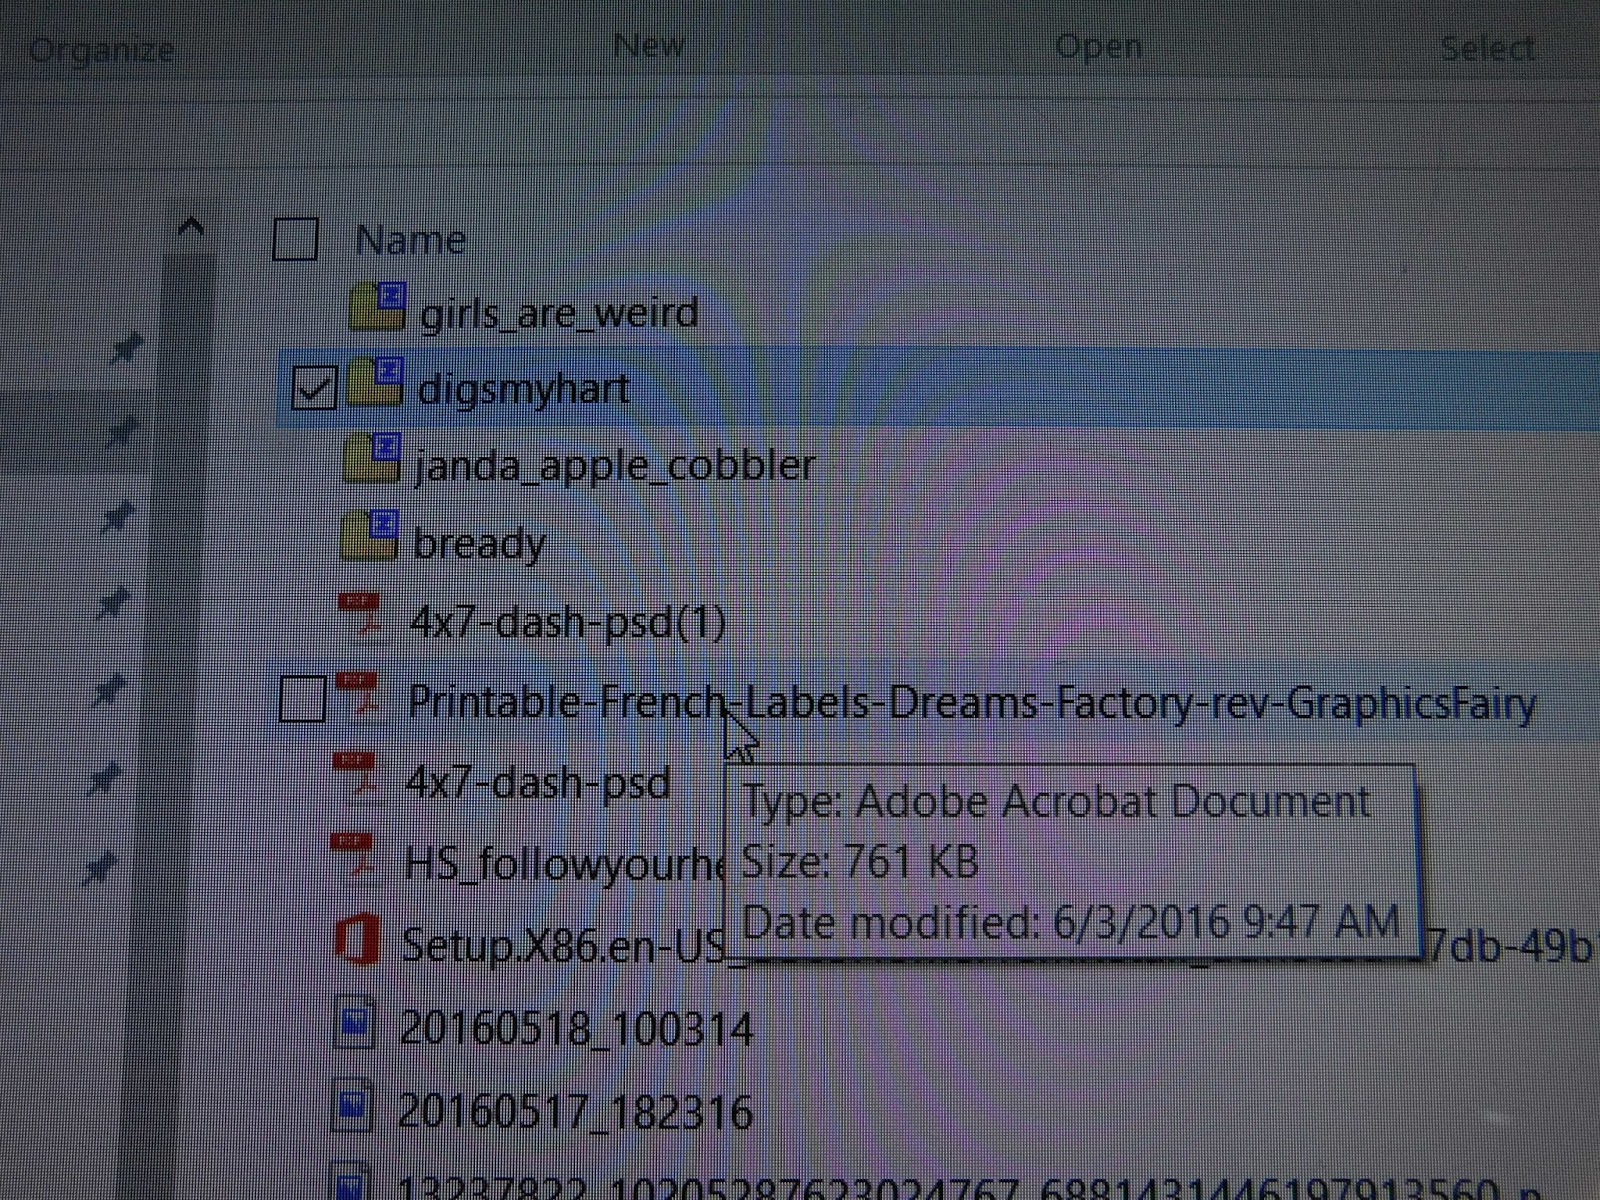
 There are a lot of fonts that you can download for free and some u have to pay for. The one I chose was (digsmyhart) and download the zip file from the website to your hard drive .

Once you download this you have to save it into your fonts folder. Go to your control panel and search for your font folder.

 Open the zip folder and copy and paste the ttf file to the font folder and Voila!
STEP 4. So now I need to figure out what I am gonna say (saying wise) and how I am gonna do this. Well I could of hand wrote it with the MINC pen, but two things it doesn't have going for it..it's narrow, slow and its my handwriting! (Im left handed and write like a draftsman..)..nope..that is why I downloaded the fonts.

I chose the saying "You look cute sitting on a Nash" to go with the car ad remember..

Here it is printed out with the digsmyhart font. Well to foil this, it must be printed on a laser printer with toner ink. You can print this out on your regular inkjet and go to your local print shop, scan and print it out with their copier...(results are mixed generally they aren't dark enough and don't have enough toner in them to get a perfect print like above, what a pain in the xxx, ) so...after several attempts, that meant...buy myself another printer! Yeah crazy right just to foil? well I plan on doing this a long long time...so off to Staples I went and bought myself another HP laser printer. It had to be wireless and had to be a black toner printer, oh and HP..of course! Voila! again.The HP P1102w printer installed. Can you say printer no#5!!!!
 So I had to find room in my Art room to install it, download the driver, software, put paper in it and magically Im ready to print and foil.

I wanted the text to have a background and not be on printer paper (how blah is that!), and of course I needed some 8.5x 11 scrapbook paper to put into my new printer..so off to Walmart I go. Here's what I chose to use.

Now to foil that font, well there are a myriad of colors to choose from, I chose to use the new Gold and Pink Ombre foil for the words and embellishments. The wheel cutter is the perfect tool to use to cut the foil with.

 Here's the printed toner text on scrapbook paper and the Ombre foil cut before running it thru the MINC large machine.
 and here is it foiled!
STEP 5: OK, I could of printed this directly on the 12 x 12 page but what the fun is that? I want a layered look to the page. Now to cut the text from 8.5 x 11 down to size. To do that I need a metal die that cuts the paper in a specific pattern. Why you ask? Did I mention that I am left handed? Since the beginning of time ..right handed people have made us left hander use their right handed implements...needless to say I'm not the best scissor user! But almost every scissor I have and (I have scissors in every room of this house) are right handed!!! Yeah, I do have three left handed pairs of scissors..one is from my childhood that my grandmother bought for me, one is for fabric and I never use it on paper and the other pair of course is in my crop bag. So die it is...
 This is the Postage stamp die from Tim Holtz that u run thru a Big Kick (a roller press) to cut the paper with...


and here it is printed, foiled and cut out of the scrapbook paper twice. Why twice you ask? I'm a little over the top in my approach to scrap booking..(I make 8 copies for all my family to have!). So only 6 more to go...
Once I have them cut I generally like to ink the edges to give it some definition. I'm using Prima Chalk edgers. I used both the cranberry colored (Blossom bud) and Black chalk edger.


STEP 6: Did I mention that I generally print my own photos. I have lots to chose from on that front, my Selphy, my large format printer HP Officejet 7612 or the HP Deskjet 2512. I chose to do this because I have lots of scrap photo paper that I can use from doing digital scrap booking.
 As it turns out, I generally am out of ink in one of the printer..this however I've learned to reload with ink from Utube. So refill the ink cartridges is a continual thing and wont bore u that process all I can say about it is-clean the print head multiple times, wear gloves and an apron.

So I have 2 photos to printed 8 times, that's 16 photos....to cut and pilled up and then we get to foil!


I didn't have the MINC paint so I chose to use the MINC mist ( which is clear and shiny) and apply it to the headlamps and bumper with a paint brush and dry with the Heidi Swapp heat tool. Below is the photo being put into the carrier sleeve with a small piece of the Ombre pink and gold foil over the photo being run thru the smaller MINC machine.

And here it is with foiled bumper and headlamps..cool eh?

STEP 7: I need a tag on the page to describe the photos and what better way to do that than with a Tim Holtz car die?
 I choose a newsprint scrapbook page to use for the tag. Originally I was gonna use my fountain pen to write on but it was too small and used a Sharpie marker to write on. I then used the MINC MISt again with a paint brush on the wheels and the same Ombre foil, into the small MINC they went.
 and here are all 8 cars cut out, foiled and annotated on.
 STEP 8: Putting it all together...more paper from Walmart...really I know! Yeah I have more paper like most scrapbookers but I wanted something that was pink, red, yellow (did I mention my favorite colors!) but non descriptive for the background.

 I used various tape runner, a roll of yellow washi tape, and a smaller 6x6 scrapbook pad with red and beige paper to assemble the final product, and here it is.
 Thank you!

What got me thinking about this was, I am doing an on-line art class from Big Picture classes and am learning how to incorporate foiling techniques into my scrap-booking and not just little embellishments, which is why I bought the MINCs in the first place. I really love the metallic and shine that it adds to a project.

So as I mention previously I've spent the better part of a year scanning, cropping, and putting pages into archival sleeves of my Great Aunt Mirta's photo albums.

I recognize about half of my relatives in the photos.

So one of the lessons in the Heidi Swapp Big Picture MINC classes was foiling on photos! So I'm gonna put foil on the bumper and headlamps..Why are they standing behind the bumper u ask? Cause they could...? OK, more to that to come... This is part one.


STEP 3. Now to incorporate some saying on the page and foil it. So I went on-line to Pinterest.com and searched on handwriting fonts that look sort of similar to Heidi Swapp's.

Once you download this you have to save it into your fonts folder. Go to your control panel and search for your font folder.


STEP 4. So now I need to figure out what I am gonna say (saying wise) and how I am gonna do this. Well I could of hand wrote it with the MINC pen, but two things it doesn't have going for it..it's narrow, slow and its my handwriting! (Im left handed and write like a draftsman..)..nope..that is why I downloaded the fonts.


I wanted the text to have a background and not be on printer paper (how blah is that!), and of course I needed some 8.5x 11 scrapbook paper to put into my new printer..so off to Walmart I go. Here's what I chose to use.

Now to foil that font, well there are a myriad of colors to choose from, I chose to use the new Gold and Pink Ombre foil for the words and embellishments. The wheel cutter is the perfect tool to use to cut the foil with.


STEP 5: OK, I could of printed this directly on the 12 x 12 page but what the fun is that? I want a layered look to the page. Now to cut the text from 8.5 x 11 down to size. To do that I need a metal die that cuts the paper in a specific pattern. Why you ask? Did I mention that I am left handed? Since the beginning of time ..right handed people have made us left hander use their right handed implements...needless to say I'm not the best scissor user! But almost every scissor I have and (I have scissors in every room of this house) are right handed!!! Yeah, I do have three left handed pairs of scissors..one is from my childhood that my grandmother bought for me, one is for fabric and I never use it on paper and the other pair of course is in my crop bag. So die it is...


and here it is printed, foiled and cut out of the scrapbook paper twice. Why twice you ask? I'm a little over the top in my approach to scrap booking..(I make 8 copies for all my family to have!). So only 6 more to go...
Once I have them cut I generally like to ink the edges to give it some definition. I'm using Prima Chalk edgers. I used both the cranberry colored (Blossom bud) and Black chalk edger.


STEP 6: Did I mention that I generally print my own photos. I have lots to chose from on that front, my Selphy, my large format printer HP Officejet 7612 or the HP Deskjet 2512. I chose to do this because I have lots of scrap photo paper that I can use from doing digital scrap booking.


So I have 2 photos to printed 8 times, that's 16 photos....to cut and pilled up and then we get to foil!


I didn't have the MINC paint so I chose to use the MINC mist ( which is clear and shiny) and apply it to the headlamps and bumper with a paint brush and dry with the Heidi Swapp heat tool. Below is the photo being put into the carrier sleeve with a small piece of the Ombre pink and gold foil over the photo being run thru the smaller MINC machine.

And here it is with foiled bumper and headlamps..cool eh?

STEP 7: I need a tag on the page to describe the photos and what better way to do that than with a Tim Holtz car die?


Wow!! I read the whole post and it is amazing. U made the post more attractive with beautiful images. You have an excellent work. Well done
ReplyDeleteThings are very open and intensely clear explanation of issues. It was truly information. Your website is very beneficial. Click link to visit my site that will help you having a virtual world as the same as your real world you living.sims 4 mods
ReplyDelete